This equipment handover checklist is for the site manager or buyer who receives a rented machine and, weeks later, sends it back, often with different people on each day. It gives one list to use twice and the items that are easy to forget: keys, attachments, hour meter and papers. Contract terms and breakdowns have their own guides, linked below.
Why does a written handover matter on a rental?
A rented machine passes between two companies and often several operators. When it comes back with a scratch, a missing key or more hours on the meter than expected, nobody remembers how it looked on day one.
A written record protects the customer from paying for old damage. It protects the supplier from a machine that comes back changed.
It only works if both sides have seen it. A photo on one phone that the other side never saw is weak. Share it and ask for a reply that confirms it.
What should you check and record when the machine arrives?
Arrival is not a full inspection. You are checking that the machine matches the quote: the model, the size or capacity, the attachments, and any requirement in your request, such as a driver or an inspection certificate.
Then record the same items you will record at return. Keep them as one list with two columns.
| Item | At arrival | At return |
|---|---|---|
| Hour-meter reading, where fitted | Write the number, photo of the display | Same photo, same angle |
| Fuel level (or battery charge) | Gauge photo and note | Gauge photo and note |
| Attachments and accessories | List each one, buckets, forks, hoses, cables | Same list, tick each |
| Keys | Count and note any spare | Count again |
| Tools, manuals, supplied items | List them | Tick each |
| Condition, each side | Front, rear, left, right | Same four sides |
| Cab interior, tyres or tracks | Photo of each | Photo of each |
Write the date and time in the record. Phone photos usually carry them in the file details, but a written note is easier to show.
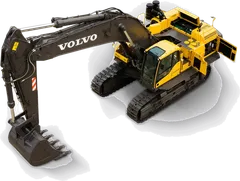
One line of a record might read, for example: "9 Oct, 14:20. Excavator, serial number on plate noted. Hour meter 3,208. Fuel three-quarters. Bucket, two spare teeth, one key. Dent on left side, rear panel." Short and specific is enough.
If a transporter delivers the machine and you cannot be there, name one person on site to do the record and send it to the supplier the same day.
Tip. Photograph the hour meter close enough to read the number. Then take one wider photo of the dashboard, so the reading is clearly from this machine.
Which documents and certificates should arrive with it?
Ask for the papers before dispatch if you can, and check them when the machine arrives, not after the first problem. Typically this means:
- The registration or ownership paper, where one applies to the machine.
- The current inspection certificate, with its expiry date, for machines that need one. For lifting machines, what to check on a lifting equipment inspection certificate goes line by line.
- The operator's papers, if the supplier provides an operator.
Then do the one check people skip. Read the plate or serial number on the machine and compare it with the number on the paper. A good certificate for a different machine does not help you.
What is required differs by project, site owner, municipality and insurer, so confirm it with your site owner or insurer before the machine is mobilised. For insurance questions, see insurance questions to settle before a machine arrives.
How do you record existing damage so you are not charged for it?
Take dated photos from all four sides of the machine. Add close photos of the cab interior, the tyres or tracks, the attachment and the hour meter. Work around the machine in the same order each time, so the photos line up one to one at return.
Mark every existing mark: dents, cracks, leaks, worn teeth, damaged lights or glass. Write each one in the record with its place on the machine, for example "left side, rear panel".
Both sides should sign or confirm the arrival record, with the existing damage listed. In practice, a message in writing that says "arrival record agreed" is better than nothing. Who is responsible for damage is for the contract to say, so agree it in writing before the machine arrives. The equipment rental contract checklist lists the terms to settle.
Watch out. If the machine arrives with a defect that affects safe use, say so before starting work and agree what happens next. Do not start work and sort it out later.
What should you do on the first day to confirm it works for the job?
Before the real work starts, have a trained, authorised operator (see how to check an operator's competence) run the machine briefly on site. Check that it starts and moves, and that the controls, lights, brakes and warning devices work. Lifting machines do not take a trial load as part of this check: any lift follows its lift plan and the manufacturer's load chart.
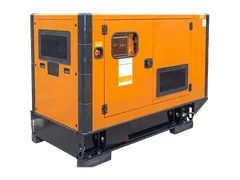
Check that it fits the job on paper: reach, capacity, attachment type and power output. A generator or an excavator that is the wrong size is better found in the first hour than the third day.
From then on, keep a short daily check. The daily walk-around inspection and defect reporting guide shows what to look at. If it breaks, follow what to do when a rented machine breaks down.
How should the return be done so it matches the arrival record?
Return it the way you received it. Use the same list, the same photo angles and the same order.
- Clean the machine as the agreement requires. Mud can hide damage, and both sides then argue about what is under it.
- Take the hour-meter and fuel photos first.
- Walk round the four sides, then the cab, tyres or tracks, and the attachment.
- Check the keys, attachments, tools and manuals against the arrival list.
- Compare each new photo with its arrival twin. Anything that differs is new.
- Have both sides confirm the return record, ideally with the supplier present or in writing at once.
If you return it early or later than planned, the extension, early return and deposit guide covers how that affects the arrangement.
What causes most disputes at return, and how do you prevent them?
Most disputes come from a few causes. Each has a simple prevention.
| Common dispute | Why it happens | Prevention |
|---|---|---|
| Fuel level | Start level was never recorded | Photo the gauge at arrival and return |
| Hours used | No reading at arrival | Photo of the hour meter both times |
| Damage | Nobody wrote down the old marks | Dated photos, four sides, signed record |
| Missing items | Keys, attachments or manuals not listed | One list, ticked twice |
| Cleaning | Condition at arrival not agreed | State it in the quote or contract |
| Papers | Certificate expired or for another machine | Check dates and serial number |
Fuel, cleaning and hour-based charges follow what was agreed in the quote or contract. If fuel comes back at a different level than at arrival, the agreed rule decides who pays. That is why the starting level matters so much.
How to do this on Maedah
Maedah does not inspect machines or take part in the handover. You and the supplier agree the points between yourselves. Use the chat tied to the quote to keep that agreement in writing.
When you post a request, state what you need to check on arrival, such as a driver or a current inspection certificate. Compare the quotes side by side, then raise the handover points in the chat before accepting. If you are renting excavation equipment or power equipment, ask which attachments, keys and papers will come with the machine.